web stats
Home Authors Posts by Bhanu Sahu

Bhanu Sahu

Bhanu Sahu
238 POSTS 0 COMMENTS
Talks about real estate and finance. Besides this, he is an eternal optimist , he loves to explore new heights and worships nature.

15 best POP designs to give your home an appealing look

Designer ceilings and walls could make a strong impression and become focal points of your beautifully decorated home. There are numerous simple, inexpensive POP design ideas if you want to add a false ceiling to improve the decor of your home. Depending on the desired effect and budget, there are many materials available for designing ceilings. The plaster of Paris, or POP, ceiling designs are the most popular. It is renowned for its stylish and lovely appearance, straightforward installation processes, and its reasonable costs. POP contains a white powder that becomes hard when mixed with water. It can be used to make artistic trimmings and faux ceilings for interior design. 

Another great way to incorporate recent Vastu discoveries into your home is through POP interior design. Low-cost simple POP design ideas are a great way to hide any exposed wires while also enhancing the aesthetics of the house. It is energy-efficient and helps insulate the temperature of a room. 

Simple and  budget Pop Design Ideas for your home 

There are many flawed ceiling designs on the market today, which confuses home buyers. Therefore, if you’re looking for easy, affordable POP design ideas, you’ve come to the right place.  

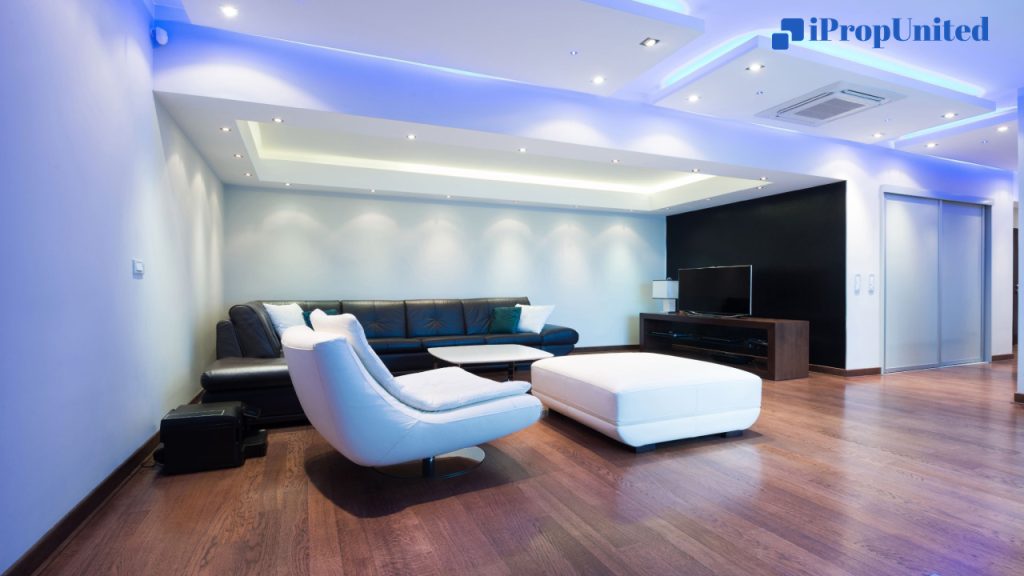
Layered Simple POP Design for Little Money

Making a layered ceiling out of POP is the most accessible POP application in your home. Due to the additional flair, it gives the décor, this is especially great for small spaces. To brighten your room, place strips of lighting in between the layers. You can select different colors of POP to add character to your home.

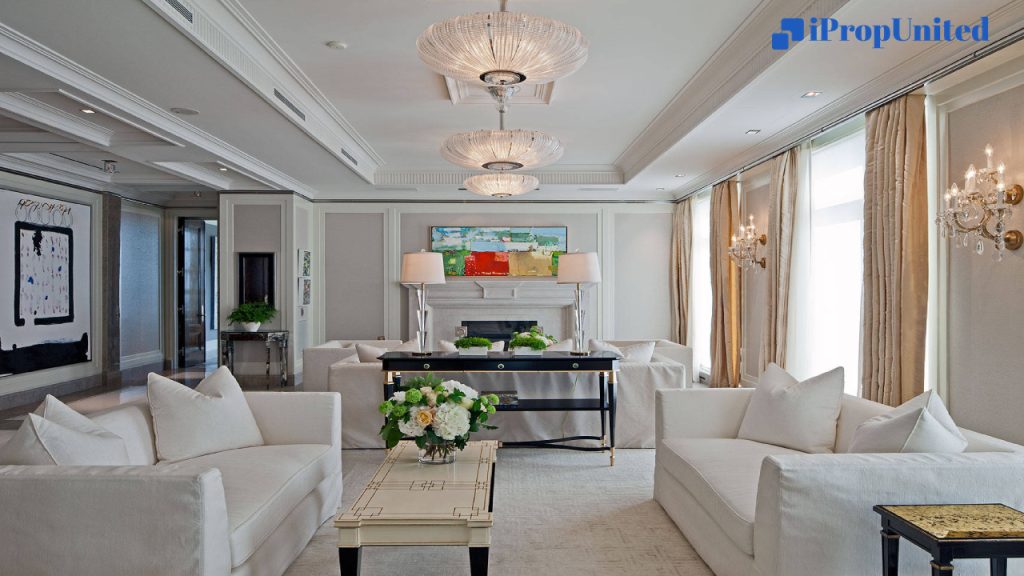
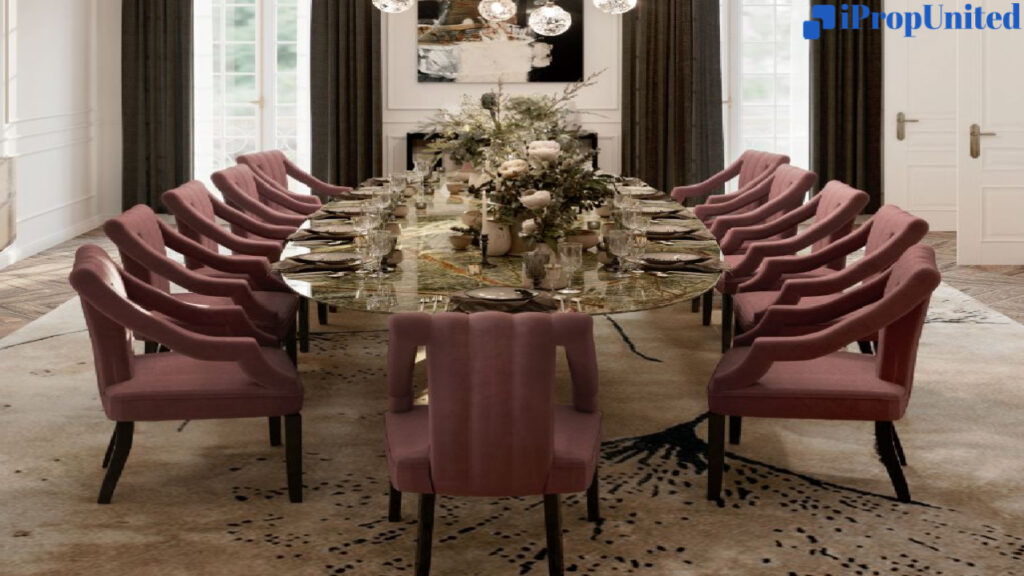
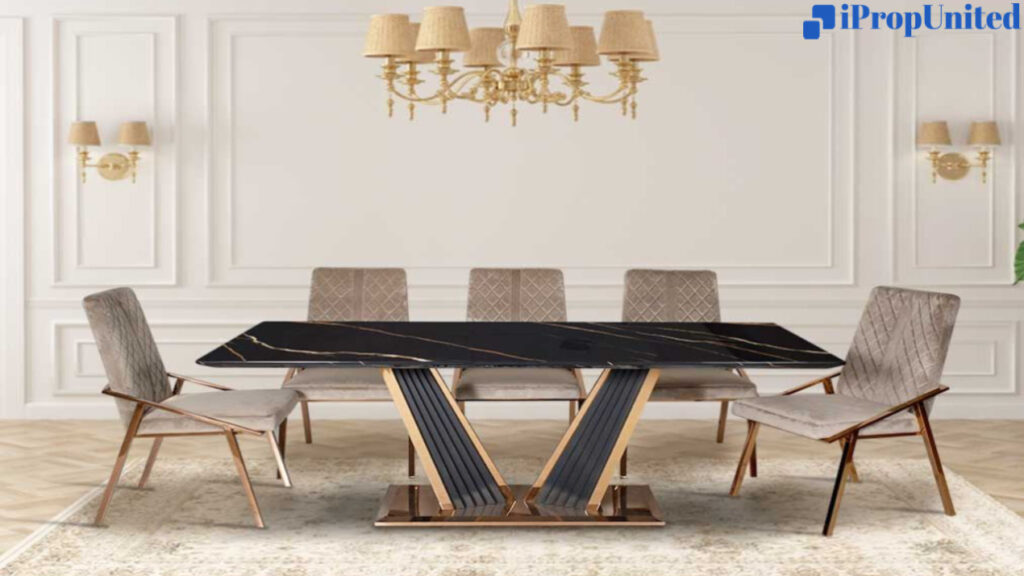
Enhance Your inexpensive Simple POP Design with Statement Lighting

Consider a statement lighting fixture to complement your POP ceiling if you are concerned that your home does not look fashionable enough. For a warm or neutral POP false ceiling, a multi-tiered antique chandelier works beautifully. This gives your home an extra touch of glamor and glitz.

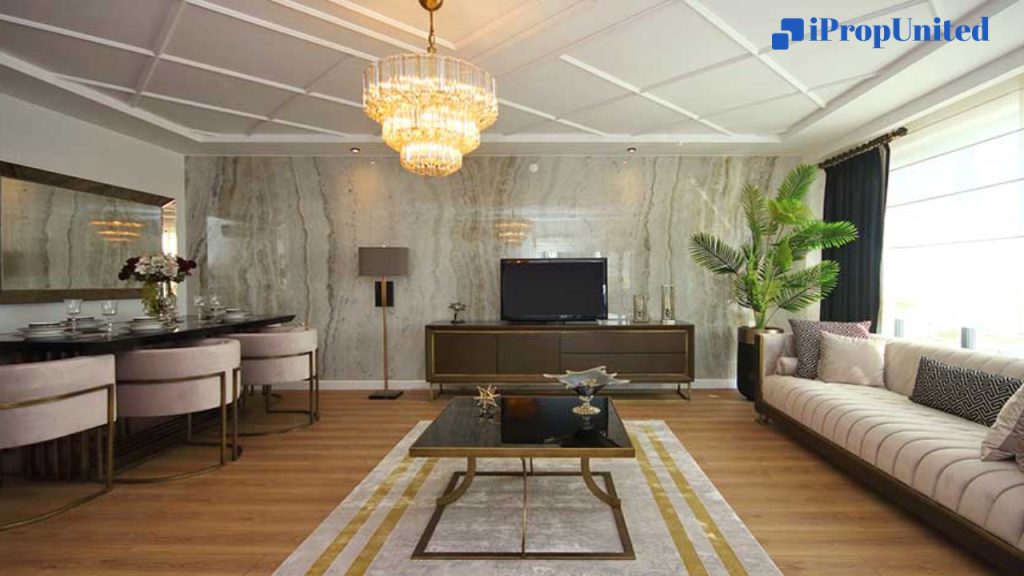
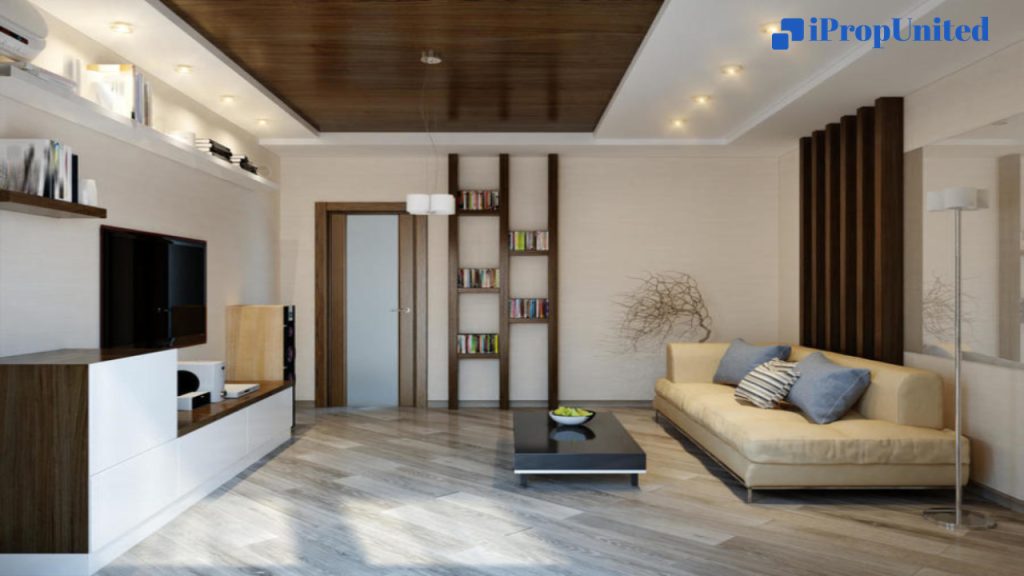
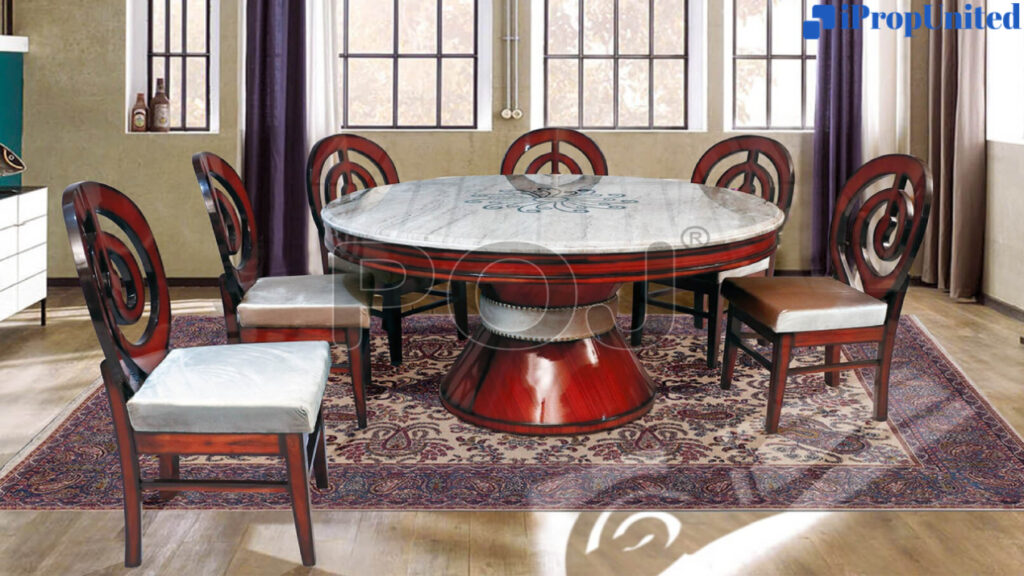
Integrate Other Materials Into Your Simple POP Design

It is wrong to assume that you cannot use different materials in your home’s POP design. Glossy hardwood ceilings can be an excellent complement to plaster of Paris. Think about installing indented POP moldings along the two ends of your ceiling and a premium wood panel in the middle.

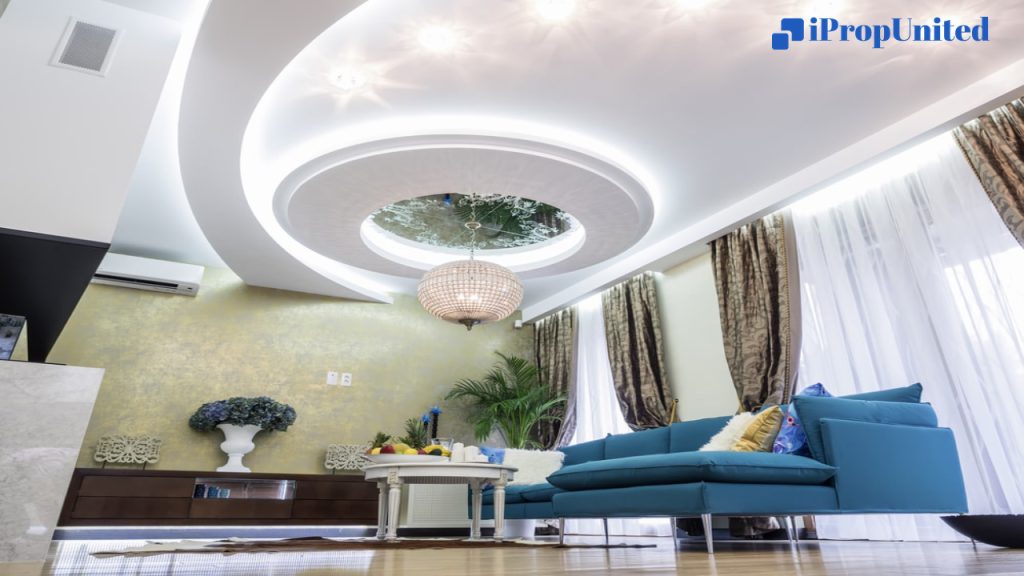
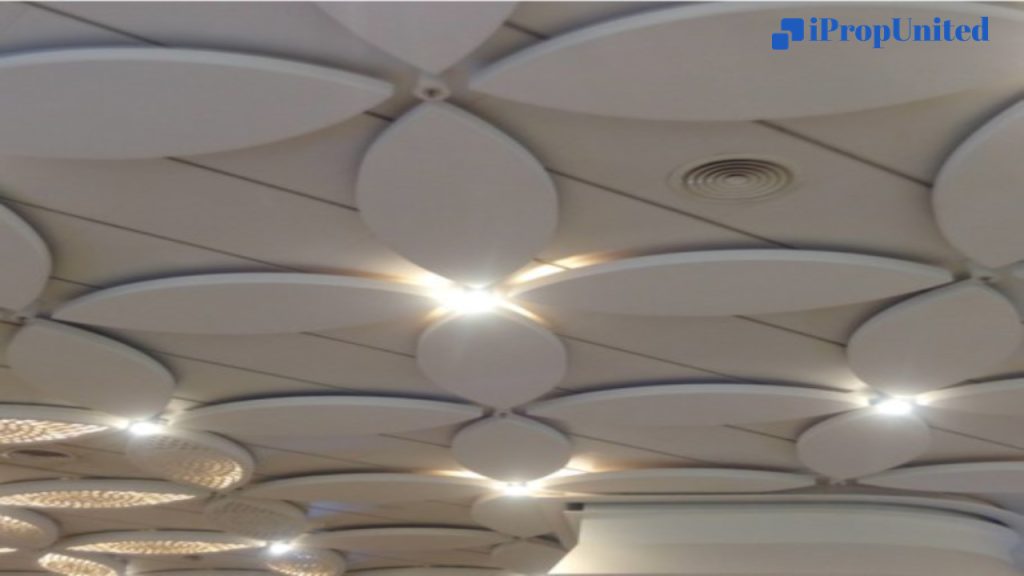
Go For Grandeur in Your Low Cost Simple POP Design

A POP false ceiling is ideal for you if stylish opulence is what you’re going for. For your POP ceiling, never forget to pick a distinctive shape or pattern. An excellent design choice is a mystic spiral. The structure’s internal studded lights can be used to illuminate the space in a variety of hues and sizes.

Use Colored Lighting to Accentuate

The simplest way to make your POP décor come to life is to add colored lighting to it. For POP false ceilings, blue, yellow, and soft red are frequently regarded as the best lighting options. The impact of each false ceiling panel can be improved by using various tones of the same color.

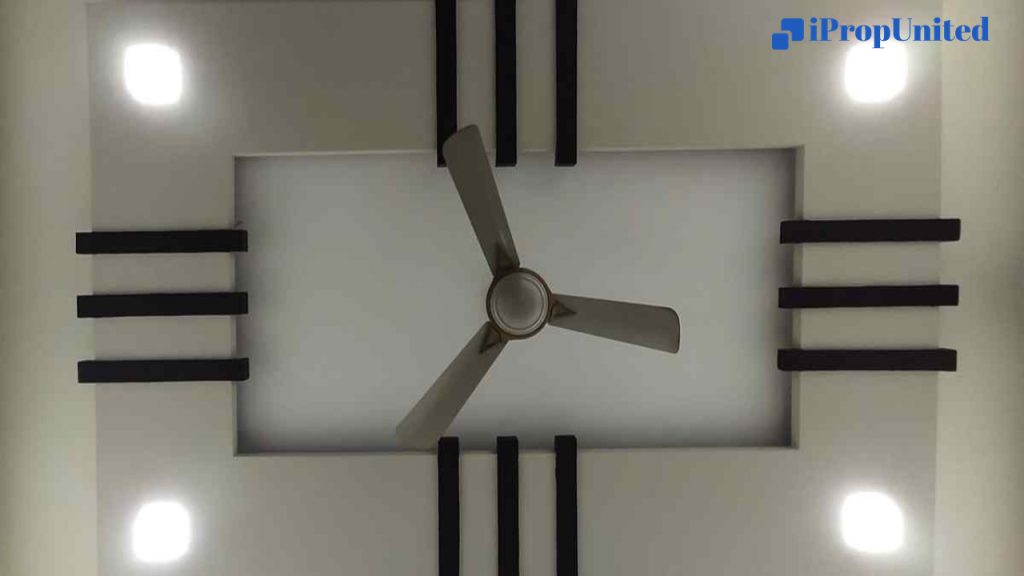
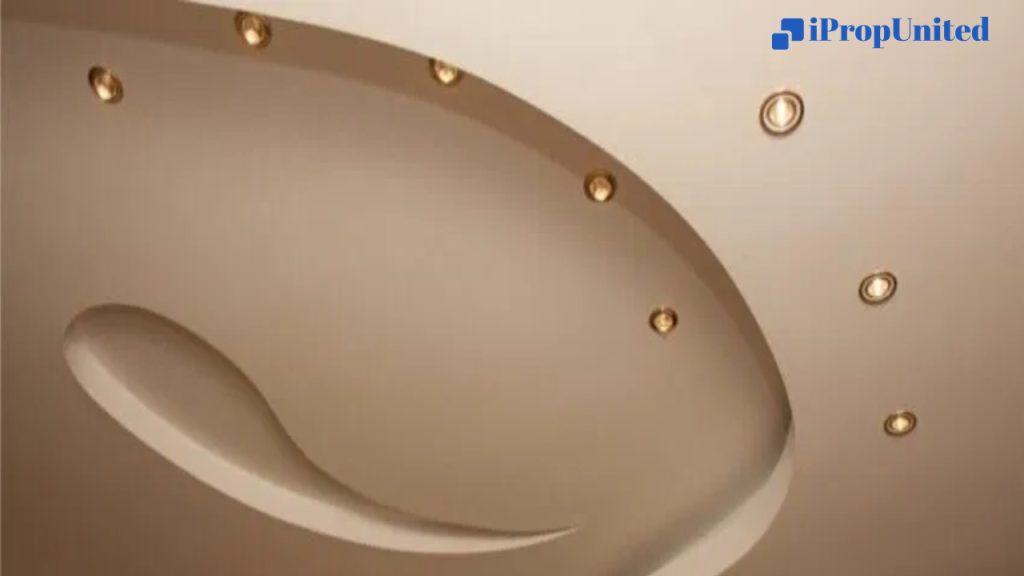
Traditional Yin and Yang Low Cost Easy POP Design

The traditional yin and yang ceiling design is a great choice if you’re looking for a low-cost, simple POP design. It’s not always necessary to have elaborate false ceilings. All interior designers have always loved the color combination of black and white. Therefore, combining some black vertical stripes with a plain white POP ceiling can be extremely effective.

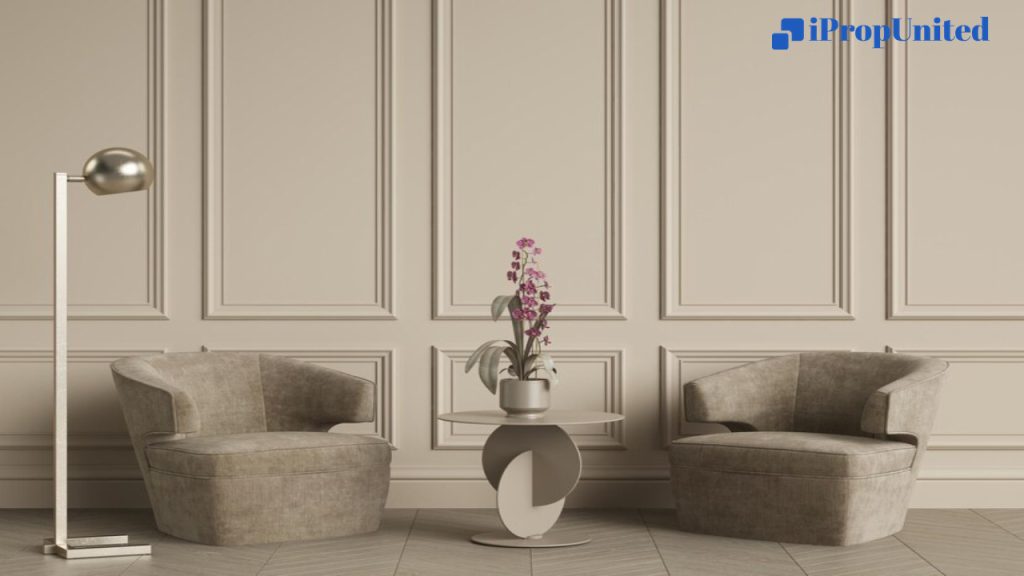
Designing a Modern Simple POP Mold

You can use delicate POP designs to decorate the walls of your home as well. Always try to keep things simple if you choose POP moldings for your living room walls. Using simple two-tones and dark, muted hues can look magical.

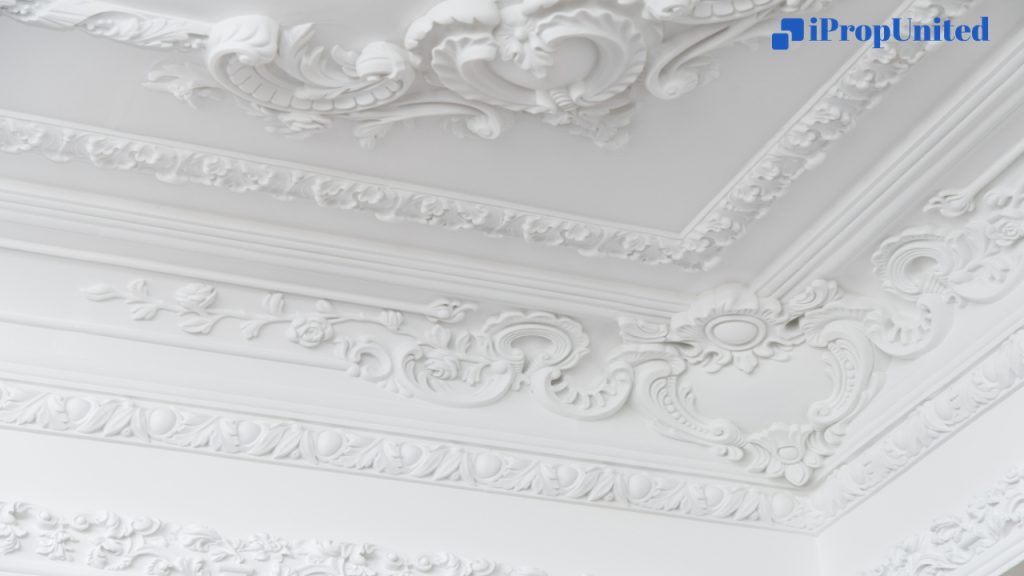
White Low Cost Simple POP Design

When you use white consistently throughout your POP design, it works best. It adds an ethereal antique charm to your ceiling. Decide on intricate carvings in all-white POP if you enjoy the old-world charm of palaces and museums and want to replicate it in your own home.

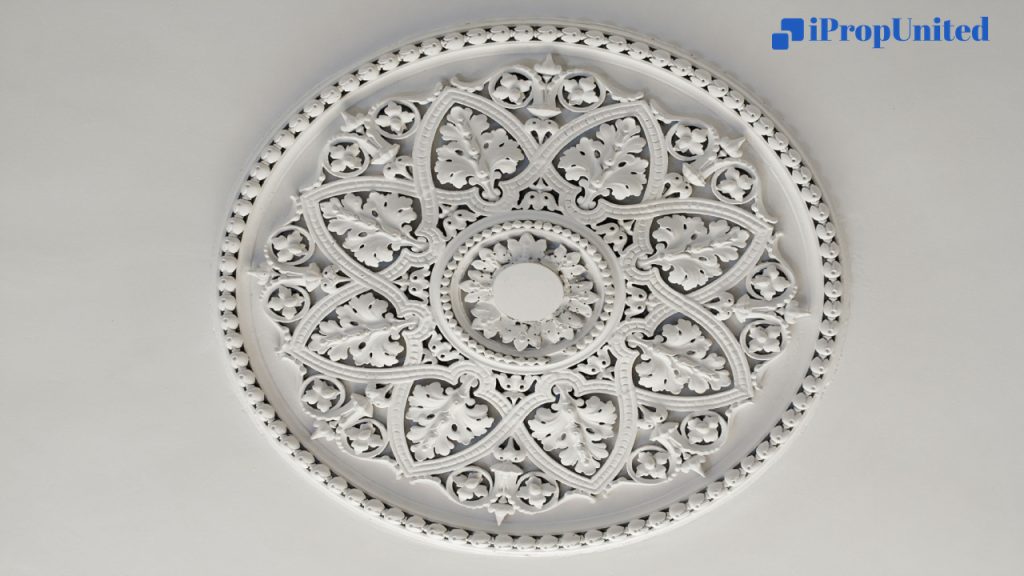
Add an antique ceiling plate

Incorporating exquisitely carved ceiling plates into your POP design is another inexpensive way to create a fairytale-like appearance in your home. A circular or rectangular antique plate could be placed precisely in the center of your ceiling. It can be decorated by carving lovely flowers and other designs.

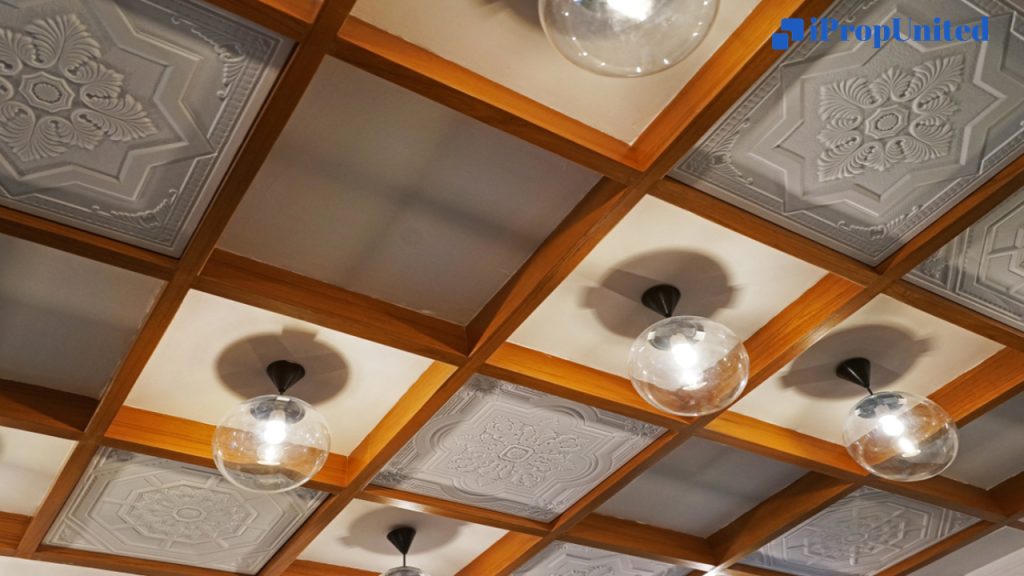
Coffered Simple POP Ceiling Design

Coffered ceilings are a popular choice for a contemporary POP design in your living room or bedroom. Your POP ceiling can look classy and sophisticated with a few simple square partitions. Your rooms get a clutter-free vibe from it, and the entire architecture looks airy.

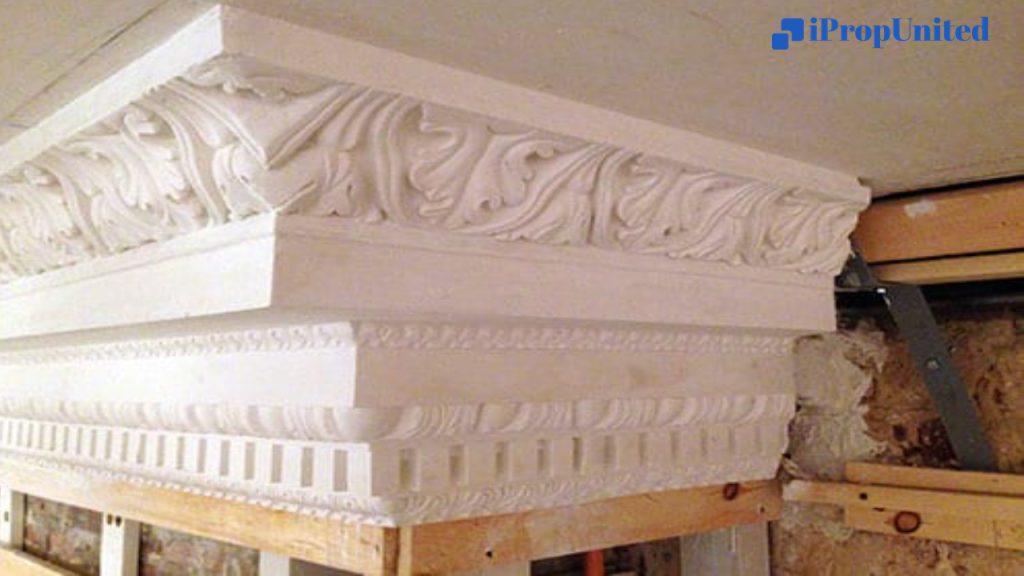
POP Design With Complex Corner Crown 

A simple low cost POP design incorporates Plaster of Paris into the crown molding. The carvings look more beautiful the more intricate they are. It only requires a small investment and gives your room an antique feel in every area. When compared to darker wall colors, white crown moldings are frequently preferred. 

Use Panels and Lighting for your Simple POP Design 

Instead of creating an entire ceiling out of plaster of paris, simply choose a coffered ceiling and fill in the alternate partitions with exquisite POP molds. Innovative lighting fixtures, such as tiny transparent bulbs, can be used to adorn the other boxes. Make your home feel extra special by choosing ambient yellow lighting.

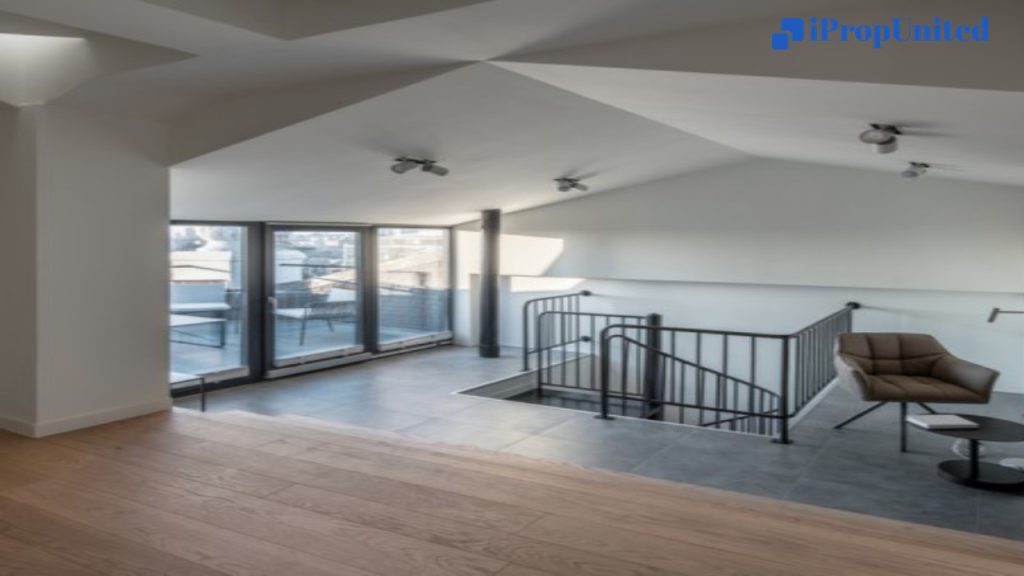
Simple Geometric Shaped POP Design

Plaster of Paris has the advantage of being moldable into any shape or form. So choose elegant geometric patterns if you want to give your home some cutting-edge architectural features. Your walls can be perfectly decorated with slanted false ceilings, protruding triangles, and multi-edged geometric patterns made of plaster of paris.

Affordable False Ceiling with a Simple POP Design

A quick and affordable way to spruce up your POP ceiling is to add ostentatious features to a basic false ceiling. Start by choosing a simple, neutral-colored Plaster of Paris false ceiling. As a decorative element, you can hang pendant lamps or bulbs that cascade from the ceiling.

Include Halogen Spots in Your Simple POP Design

Finally, your POP design can be incredibly helpful if you want your rooms to be evenly lit. Simply place bright halogen spots all over your false ceiling. For your halogen spots, you can choose from a variety of color schemes. You can use bright, cool lights in the kitchen or bathroom, while the lights in your bedroom can have a warmer undertone.

Colours Ideas To Elevate The Look POP Design 

Regal gold: Use neutral colors like silver and gold to enhance the appearance of your simple POP design. Both the living room and the bedroom look great with these colors. You can highlight it with the hidden lights and cover the room in a gorgeous, textured shade of gold. 

Aqua blue: Cool furnishings in soothing bedrooms conjure up images of a relaxing day spent beside calm waters. Your ceiling should be a soothing color to the eyes since it’s the first thing you see when you wake up. POP paint in shades of aqua blue has the ability to calm you down and improve your mood. 

White-on-white: A white false ceiling will always look elegant, outlasting a variety of color choices. It reflects light and creates the illusion of depth, making spaces appear larger than they actually are. By layering and patterning a white artificial ceiling, you can add textures that contrast the room’s monotony and give it character.

Purple: A transition from the deepest shade of purple to the lightest shade is known as a purple adaptation. With this layout, any room’s POP design will be gorgeous and unique.

Yellow: You’ve probably seen a living room with the POP color combination of yellow and white. It’s a relatively new concept to paint the ceiling in beige and yellow tones with zigzag patterns. Any size or shape of space would look fantastic with it.

Vibrant colors: Warmth and compassion are prioritized over simplicity in spaces like children’s bedrooms. It might add warmth and visual appeal to the space to splash some vibrant colors on the false ceiling. The artificial ceiling’s stunning colors give the space a cheery and soothing feel.

Black: Black coffee isn’t for everyone. But you might prefer darker ceiling paint colors to lighter ones. When other elements dramatically and strikingly contrast a room’s plunging black top, contemporary living spaces can have a lot of drama.

Budget-friendly Simple POP Design Ideas 

Before choosing a POP ceiling design, it is important to make sure that the height from floor to ceiling is sufficient to support a false ceiling without making the space feel cramped.

Pre-Plan: Plan ahead by organizing the lighting so that you can choose the best false ceiling design.

For small spaces: Avoid using moulding in small areas and opt for a straightforward POP ceiling design with clean, straight lines.

For large spaces: To add drama to large spaces, consider using double-layered ceilings or unusual forms, textures, and finishes.

Create a border: To maintain the size of a space with limited height, consider designing a POP ceiling that follows the edge of the walls. Adding mood lighting is another option.

Maximize: To maximize the space between them, all copper pipes, AC ducts, and electrical lines should be hidden inside the POP ceiling.

Create assistance: A slab is more enduring and less brittle than a gypsum ceiling. Therefore, it is crucial to know how much weight it can support before hanging any ceiling lights, chandeliers, or decorative items. It is advisable to install a piece of plywood or MDF just above the gypsum sheet for safety as it will provide strength and support the item’s weight.

Fan rod: Prior to the installation of a false ceiling, the rod of a ceiling fan must be fixed to the ceiling slab in the case of gypsum or any other lightweight ceilings.

Consider strength: To support the weight of the swing and the weight of the people sitting on it, a strong hook must be installed in the ceiling slab.

Create insulation: If you are installing a POP ceiling in a room that is directly below a terrace, use thermocol sheets to create insulation and stop heat from leaking into the space. Additionally, it will use less energy while improving the efficiency of air conditioning.

Bottom line 

False ceiling designs could give your living area a chic and appealing look. With these simple, POP design ideas, you can enhance the area’s aesthetic appeal. Don’t forget to try new things and use your creativity to give it a more unique flair. The POP ceiling can be used in a variety of ways, whether it’s in your hallway, bedroom, or any other room. Always pay close attention to your POP design concepts to make sure they blend seamlessly with the rest of the home’s furnishings and decor.

Follow and Connect with us: TwitterFacebookLinkedinInstagram

Save Tax On Property Sale— All About Applicable Taxes

If you are a property owner looking to sell your ownership, it is crucial to consider all aspects related to the sale process in order to maximize your capital gains. Whether you are selling the property as an investment or are in need of capital, it is important to take into account the taxation components of the sale before signing the agreement to sell property. 

In fact, a lot of financial consideration goes into chalking out the sale agreement of property, especially regarding the taxation aspects. If you are relocating, you may want to ensure that you gain the maximum benefit possible from the sale of your property, while also minimizing the amount paid in taxes.

Thus, it is important to understand the taxation aspects from the Government’s viewpoint when considering how to sell property without incurring an excessive tax burden. By doing so, you can ensure that your property sale proceeds smoothly and that you obtain the best possible outcome.

Who Levies Tax on Sale of Property?

When a property is sold, the seller is liable to pay taxes to both the central and state governments. These taxes are levied under different heads and are either borne by the buyer or the seller. It is important to understand the various taxes involved in the sale of property to ensure compliance with the regulations.

Which Taxes are Applicable on Sale of Property?

When you sell your property, you may have to pay certain taxes as follows:

Capital Gains Tax

Capital Gains Tax is a tax that you need to pay on any profit that you make from selling the property. The amount of Capital Gains Tax that you need to pay depends on how long you have owned the property. If you have owned it for more than three years, you will pay 20% of the profit as tax. If you sell it within three years of owning it, then the tax will be calculated based on your income tax slab. 

TDS

TDS is a tax that the buyer needs to pay on your behalf while buying your property. This tax is 1% of the total sale value and is deposited with the Income Tax department. This tax is applicable only if the value of the transaction is 50 lakhs or more.

Indirect Taxes on Selling Property

As a seller, you may collect certain taxes from your buyers that need to be paid to the government. However, these taxes are actually paid by the buyers, not the sellers themselves. It is important that you ensure the buyers pay these taxes to you, so that you can deposit them with the government. These taxes are known as indirect taxes.

Service Tax

Service Tax is a tax that you need to pay on under-construction properties. The rate of this tax is either 3.75% or 4.5% depending on the area of the property and the transaction value. The buyer pays this tax to you, and you deposit it with the government. You don’t need to pay this tax if your property is already constructed.

VAT

VAT is a tax that is levied by the state government. Some states charge VAT on the sale of under-construction properties, while others do not. The tax rate and applicability depend on the state where your property is located.

Remember, you may have to pay some or all of these taxes when you sell your property.

Details Required to Deposit TDS While Selling a Property

When selling a property, you need to deposit TDS and provide the following details:

  • PAN card of buyer and seller
  • Residential address of buyer and seller
  • Residential status of the seller 
  • Address of the property being sold
  • Agreement date
  • Payment date
  • Transactional value
  • Amount paid

One can pay TDS through either online or offline mode. To make an online payment, navigate to the Income Tax Department’s online portal and complete the 26QB form. Alternatively, visit the nearest bank branch to fill out the form. In the case of an NRI selling a property, Form 27Q must be filled out.

Important Things about TDS on Selling a Property

When selling a property, it’s important to keep a few things in mind to ensure a smooth transaction: 

  • The seller must provide the buyer with a PAN Card to obtain Form 16B. 
  • It’s also important to verify the annual Form 26AS to ensure the correct amount is being paid. 
  • If TDS payments are not made on time, penalties may be levied by the authorities.

How to Save Tax on Property Sale?

It is possible that you have calculated the total tax on the sale of your property and found it to be a significant amount. In this scenario, you may be curious about ways to reduce the tax burden on the sale of your property. Understanding if there are any measures you can take to ensure a reduction in tax deduction is essential. The government has provided certain exemptions and rebates that can help you achieve this goal, which we will elaborate on below.

Saving Tax on Property Sale by Reinvesting in House or Plot

As per Section 54 of the Income Tax Act 1961, individuals and HUF can avail tax-saving benefits on the Capital Gains or profit earned. One of the most commonly used methods to save tax is by investing the gained amount in another property within a period of three years from the date of sale. However, this form of investment can only be made once in a person’s lifetime.

In the following examples, we will take a detailed look at how this process works and the different investment options available to you. 

Example 1

Priya bought a lovely property back in 2015 for INR 50,00,000/- and recently sold it in 2020 for Rs. 70,00,000/-. Since she held onto the property for more than 3 years, it’s considered a long term capital asset. 

Now, you might be wondering – how can Priya save tax on the sale of her property? Well, she’s eligible for tax benefits under section 54 if she invests in a new property in one of the following ways:

  • Purchase a new property one year before the sale of the old property, that is in the year 2019.
  • Purchase a new property after two years of the sale of the old property, that is in the year 2022.
  • Construct a new property or buy a plot within 3 years, that is by the year 2023.

And you know what’s great? Priya can even acquire two residential properties and still avail exemption on both, as long as the cost does not exceed 2 crores of both properties combined.

Example 2

Hey there! I have some information that might interest you. Sushil recently sold a property that he had purchased back in 2010 for 1 crore. He made a profit of 2 crores as he sold it for 3 crores in 2021. The good news is that he can invest that money in two residential properties of 1 crore each for tax benefits.

However, if he decides to sell the property for 7 crores with a capital gain of 6 crores, he can still save tax up to 2 crores by investing in two residential properties worth 3 crores each. Please note that he can only claim tax benefits for one of the residential properties.

Capital Gain Account Scheme (CGAS) for Sale of Property 

If an individual is unable to immediately invest their capital profit into constructing a house or investing in property, they may opt to park the profit amount in a Public Sector Bank under the Capital Gains Account Scheme (CGAS). However, this is only a viable option if they are planning to invest in another house in the near future. It’s important to keep in mind that there is a limited window of 3 years to make such an investment, failing which the parked sale amount will be taxed at 20% along with a 3% cess for long-term Capital Gain. 

As per assessment year 2020-21, the exemption benefit is applicable for the purchase of up to 2 residential properties up to INR 2 crores. As per Section 54, the exemption benefit does not extend to the purchase of shops or commercial properties.

Investing in Bonds (54EC) on Sale of Property

The Income Tax Act, 1961 provides taxpayers with an opportunity to save on taxes when selling property by utilizing Section 54EC. It’s important to note that this option only applies to long-term capital gains. By investing in specified financial assets, taxpayers can protect their hard-earned capital gains from taxation. The investment must be made in notified bonds issued by the National Highways Authority of India (NHAI) and Rural Electrification Corporation (REC) within six months of acquiring the amount. 

It is important to keep in mind that taxpayers are only allowed to invest a maximum of INR 50 Lakhs in these bonds in each financial year. Additionally, there is a 3-year lock-in period when investing in these bonds. Transferring the bonds or taking a loan against them within three years of investing will result in the taxpayer being charged capital gains tax. Therefore, careful consideration must be given before making this investment.

Conclusion

When you’re ready to sell your property, you don’t want to lose a big chunk of your profits to taxes. So, while you’re figuring out the best way to sell your property and finding the right buyer, take some time to look into ways to reduce your tax burden. Remember to keep these points in mind before you sign any agreements to sell your property.

Follow and Connect with us: TwitterFacebookLinkedinInstagram

Best Marble Dining Table Designs for Luxurious Home

Adding a marble dining table to your home can add a touch of elegance and sophistication to your interior design. Marble dining tables make a strong statement and are sure to impress your guests. If you’re in the market for a marble dining table, there are a variety of designs available to suit your taste and space.

Marble Dining Table Design Ideas 

Round Marble Dining Table Design

If you’re working with a small space, don’t let that limit your dining table options. The circular marble 4-seater dining table is perfect for small homes and rented apartments. The design is sleek and modern, yet still luxurious and elegant.

Combination of Wood, Iron and Marble

For a truly unique dining table design, consider a combination of wood, iron, and marble. This combination creates an incomparably extravagant look that is sure to impress. Look for a dining table with wooden legs, an iron frame, and a marble top for a design that is both stylish and sturdy.

Oval-Shaped Marble Dining Table 

If you have a spacious, palatial home, an oval-shaped dining table with four-legged dual stands and a golden border on the periphery of the table is the perfect design idea to add a regal touch to your dining room.

Textured Marble Dining Table Design

For a subtle yet stylish look, choose a dining table with a textured marble top. The texture adds a worldly, sophisticated look that is sure to impress your guests. Choose any shape or size of the table that suits your space and style.

Rough Polished Marble Dining Table

If you’re looking for a unique style statement for your home, consider a dining table with a rough polished marble top. The rough finishing adds a touch of rustic charm to your dining room while the stainless steel legs balance the look for a modern, sophisticated design.

Narrow Marble Dining Table Design

If you’re short on space but don’t want to compromise on style, consider a narrow yet lengthy marble dining table. This design is perfect for small spaces and can accommodate more than four people, making it great for dinner parties or gatherings.

Water Green Colored Marble Dining Table

If you want to add a touch of color to your home, consider a water green colored marble dining table. This unique design adds an authentic and exclusive look to your space, making it perfect for luxurious homes.

Bohemian Marble Dining Table  

For a more eclectic look, a bohemian style marble dining table is the perfect choice. Look for a pillar-legged dining table with golden metal rods on the legs for a stunning, unique design.

Bottom Line

There are a variety of marble dining table designs available that can add a touch of luxury and elegance to your home. Choose the design that best suits your style and space to create a dining room that is both stylish and functional.

Follow and Connect with us: TwitterFacebookLinkedinInstagram

Making the Right Real Estate Investment: Differentiating Between End-Use and Investment

A guided decision with well-defined aims and objectives should be made while real estate investment, especially one that is registered in your name. While investing your entire life’s resources in the real estate market, one cannot simply allow any room for uncertainty. Although the terms “investing” and “end-use” are commonly used in relation to purchasing real estate, many people are unable to distinguish the subtle differences between the two. For instance, while the location is crucial when purchasing a property for personal use, it may be possible to make some accommodations while making an investment. Let’s take a closer look at these crucial variables.

Location

End-users: For people who intend to purchase a home with the intention of moving in at some point in the future, location is crucial. Be sure the area can accommodate all of your demands and is readily located. It should be connected to other areas of the city and have access to amenities like shops, schools, and hospitals. One must also take the neighborhood into account and decide whether or not it fits their lifestyle. Even if you choose a suburb where you don’t intend to move right away, consider aspects like the political stability of the area, infrastructure plans put forth by the local government and the federal/state governments nearby, and ongoing large-scale residential construction projects. This will enable you to evaluate the area’s livability index.

Investors: For people purchasing a house solely for investment purposes, a comprehensive analysis of the area is crucial. Real estate experts advise investing in newly developing areas like those in the suburbs or on the outskirts of the city to increase your chances of making a profitable return on investment (ROI). Although these developing areas might not yet have all the necessary social and physical amenities, they do offer reduced entry costs and thus better potential for price appreciation. Yet, you must be certain of how long you plan to remain in the market. For instance, it makes sense to invest in a community that is still in the early stages of development if you have about 10 years to spare. Choose a place where there has been some growth and price appreciation but has not yet hit its pinnacle if your time horizon is between three and five years.

On the other hand, if you want to profit from your investment through rental returns, you must take into account elements like the area’s livability and closeness to a major economic center.

Construction status

End-users: Status of the project End-users: If you intend to take out a home loan, the stage of construction of the property you are hoping to purchase will affect your monthly outlay in the form of EMIs. For instance, it can make more sense to buy a property that is nearly ready for possession if you are currently renting. If not, managing EMIs and rent will be a double load for you. But, as an end-user, you must consider the advantages and disadvantages because purchasing closer to possession includes a higher value than at launch.

Investors: It makes financial sense to invest at the pre-launch or launch stage if you’re looking for quick returns. When there is no guarantee of timely delivery, you pay less but run a bigger risk. When development on the property is halfway complete, you can leave and use the money you saved to buy another piece of real estate. Yet, if you leave at the moment of possession, you will benefit the most, provided you are prepared to wait that long. You can think about investing when the property is just partially finished if you don’t want to wait too long to take possession. The initial investment would be higher in this situation, but you might be able to rent the property out within a year or so and make rental income.

Infrastructure 

End-users:  When purchasing a property for end-use, confirm that the neighborhood has developed infrastructure. Easy and content living is ensured by a decent road system, the presence of renowned schools, hospitals, and recreational areas nearby, as well as the accessibility of key connectivity points like the airport, metro, railway station, and bus stops.

Investors: Occasionally, the social and physical infrastructure in many suburban regions and outlying places may not be the finest. One must check to see if the neighborhood is part of the master plan for the larger metropolis. A potential investor should also check to see if the state or central government has announced any initiatives that might increase the site attractiveness index of the area, spurring investment and rental growth.

Property type

End-users: Only you are in a position to determine which sort of property—a plot, house, villa, or apartment—would best meet the needs of your family. Thus, base your purchasing choices on your family’s necessities.

Investors: If you want to see a good return on your money, make sure to purchase a property type and configuration that is in high demand. You might need to speak with as many property advisors as you can in order to do this, in addition to conducting in-depth web research. The demand can be determined by following real estate forums and communities. It’s interesting to note that each city has a popular layout and property type. Individual homes are more in demand in smaller cities than 2BHK and 3BHK society apartments are in metro areas.

Follow and Connect with us: TwitterFacebookLinkedinInstagram

How can a capsule lift be beneficial for your residence?

In recent years, capsule lifts have captivated the imagination of architects, engineers, builders, and developers alike, thanks to their sleek design and captivating interiors. This fascination has fueled a consistent rise in demand, especially in commercial spaces where luxury elevators have become synonymous with sophistication.

Additionally, there’s been a notable shift towards glass capsule lifts among high-end clientele, prompting residential homes, bungalows, and apartments to incorporate these luxurious elevators. But what’s driving this trend? Why are people increasingly opting for luxury lifts? In this blog, we’ll delve into the benefits of installing a luxury lift elevator and explore why it’s becoming a preferred choice for many.

Elevating Impressions

When you install a modern capsule lift with its state-of-the-art technology and impeccable design, you’re not just installing an elevator; you’re making a statement. Guests and clients stepping into these elevators experience an immediate sense of luxury and comfort, leaving a lasting impression that speaks volumes about your attention to detail and refinement.

Panoramic Perspectives

One of the defining features of luxury lifts, such as capsule lifts, is the incorporation of glass panels that offer passengers a panoramic view from within. This unique vantage point, providing views from three sides, sets these elevators apart, offering an unparalleled experience that traditional lifts simply can’t match.

Safety and Reliability

Concerns about safety often arise when it comes to capsule elevators, but rest assured, these designer lifts adhere to stringent safety standards and are as reliable as any other elevator. Manufactured with meticulous attention to detail and quality, luxury lifts prioritize passenger safety without compromising on style or functionality.

Low Maintenance

Unlike their conventional counterparts, capsule lifts require minimal maintenance, reducing the need for frequent repairs and associated costs. With fewer accessories and advanced technology, these elevators are not only easier to maintain but also more durable, offering long-term savings for homeowners and building managers alike.

Aesthetic Appeal

Beyond their functional benefits, capsule lifts enhance the aesthetic appeal of any space, elevating the overall ambiance and adding a touch of elegance to the surroundings. With their sleek and attractive design, these elevators seamlessly integrate into the architectural vision, enhancing the beauty of residential and commercial spaces alike.

Conclusion

With their myriad benefits, it’s no wonder that capsule lifts are gaining popularity among residential and commercial properties alike. From luxury hotels to private residences, these elevators are transforming spaces and elevating experiences. If you’re looking to enhance the beauty and functionality of your home or building, consider investing in a capsule lift to make a lasting impression that transcends floors.

Follow and Connect with us: TwitterFacebookLinkedinInstagram

Rental Agreements: Importance, Procedure and Documents

    What is a Rental Agreement?

    A Rental Agreement is a detailed document that has all the info about renting a property. It covers things like rent, how long you can stay, maintenance, and who is responsible for what. It’s a legally binding document that both the landlord and tenant have to follow. So, it’s important to read it carefully before signing. And, once signed, the terms can’t be changed unless both parties agree.

    Importance of a Rental Agreement

    The Rental Agreement is like a contract that is very important for both the landlord and the tenant. It helps to protect their rights and avoid problems in the future. Sometimes, there can be disagreements between the landlord and the tenant during the rental period. The Rental Agreement helps to prevent these disagreements by providing rules and guidelines that both parties must follow. It also helps to protect the landlord’s property and ensures that the tenant is not treated unfairly. The Rental Agreement is a crucial document that helps to keep things fair and clear for everyone involved. The following points outline the importance of the rental agreement. 

    • A Rental Agreement is a crucial document that outlines the agreements between the landlord and tenant, thereby minimizing misunderstandings. 
    • It serves as a legal safeguard by offering a framework for resolving disputes that may arise in the future, protecting the rights of both parties. 
    • Additionally, it provides guidelines for the use and maintenance of the property, ensuring the interests of both parties are safeguarded. 
    • The agreement also sets out the rights and responsibilities of each party, thereby establishing a basis of accountability for both parties throughout the tenure of the agreement. 
    • For landlords, the agreement defends their property by setting out utilization rules and outlining ways to protect the property. 
    • For tenants, it assures them of their entitlement to occupy the premises and guarantees that the clauses outlined in the agreement are met. 
    • A well-drafted agreement facilitates transparent communication between parties, encouraging a superior understanding of expectations and commitments. 
    • Furthermore, in the event of judicial procedures, the agreement provides reference points and serves as evidence of the settled clauses upon agreements.

    Duration of Rental Agreements

    The duration of a rental agreement is determined by the needs of the parties, and it is always renewed in accordance with its terms and conditions. Any property leased to a tenant for longer than 11 months must be registered in accordance with the terms of the Registration Act, 1908. Regarding the duration of the agreements, the following things need to be taken into account:

    • Flexible Terms: Depending on the needs of the parties, rental agreements can be fixed for any duration and can be renewed following their terms. In cases of rental agreements, it is typically up to 11 months.
    • Month-to-Month: Some agreements are month-to-month, which provides flexibility for tenants who may require a temporary living arrangement or have uncertain plans.
    • Fixed-Term Leases: Not all agreements, though, include fixed-term leases, which usually last for six months, a year, or more. These provide both parties with stability for the specified time period.
    • Options for Renewal: Certain leases allow tenants to extend their stay under comparable conditions with mutual consent.
    • Tenancy at Will: This is an informal agreement in which neither party has a set term and can end it at any time by giving the other enough notice. It may exist in certain contexts.
    • Lease termination clause: Rent agreements frequently include clauses pertaining to lease termination, which specify how to end a rental agreement in the event of a fixed term expiration or other events.
    • Clear Start and End Dates: To eliminate any confusion, rental agreements always include the precise start and end dates of the lease period, regardless of its duration.

    Procedure for Registering a Rental Agreement

    Registering a rental agreement is not mandatory, but it can be helpful in case of future disputes. Notarized agreements are not admissible in court.

    When renting a property, it is important to ensure that the rental agreement is registered with the local housing or municipal authority office responsible for rental agreement registrations. This process involves–

    • Keep documents ready: Gathering necessary documents such as identification proofs, property ownership proofs, and rental agreement details. 
    • Visit the housing authority: Once you have collected all the required documents, present them to the local housing authority along with a copy of the rental agreement for scrutiny. 
    • Pay registration fee: You will also need to pay any applicable registration fees, which may vary based on the duration of the lease and local regulations.
    • Verification process: After submitting the documents and paying the fees, the authorities may conduct a verification process to ensure compliance with the local laws and regulations. 
    • Pay stamp duty: If applicable, you will also need to pay stamp duty charges associated with the rental agreement. 

    Once the verification process is successful and all charges have been paid, you will receive an acknowledgement or a stamped copy of the registered rental agreement.

    • Keep copies: It is important to keep multiple copies of the registered agreement for future reference by both the landlord and the tenant. A registered rental agreement holds legal validity and is admissible in legal proceedings if conflicts arise. 
    • Renewal: In case of agreement renewals, it must be ensured that registration is updated accordingly. 

    By following these steps, you can ensure that your rental agreement is registered and legally valid, providing you with peace of mind during your tenancy.

    Documents Required for a Rent Agreement

    When entering into a rental agreement, there are some important documents that both the landlord and tenant need to provide. 

    • ID proof: A valid proof of identity, like a government-issued ID or passport, and address proof, which can be utility bills or Adhar Cards.
    • Proof of property ownership: The landlord should provide property ownership proof, such as a title deed or property tax receipt. 
    • Agreement details: A drafted copy of the rental agreement that outlines the terms and conditions should also be submitted. 
    • Witness details: In some cases, details of witnesses who can attest to the signing of the agreement may also be required. 

    These documents are necessary to ensure a fair and safe rental process for both parties involved.

    Registration Charges

    It is important to note that in certain regions, there are charges associated with registering a rental agreement. These charges are subject to variation based on the duration of the lease and local regulations. Therefore, it is crucial to have a clear understanding of these fees and include them in the budgeting process as they form an integral part of the rental agreement process. Please note that registration charges for a rental agreement are contingent on local regulations and the duration of the lease.

    Conclusion

    A well-crafted Rent Agreement is an essential tool for establishing a transparent and amicable relationship between landlords and tenants. Apart from being a legal agreement, it serves as a comprehensive guidebook that outlines the rights, obligations, and expectations of both parties throughout the tenancy period. As a dynamic document, the Rental Agreement adapts to the specific circumstances of each tenancy, promoting impartial and open communication.

    Follow and Connect with us: TwitterFacebookLinkedinInstagram

    How to set up a cloud kitchen in 2024

    Starting a restaurant business is tough because of high competition, complex regulations, and red tape. That’s why people are checking out Cloud kitchens. It’s a good option because you can get delicious food delivered to your doorstep easily and safely. Cloud kitchens are also known as dark kitchens, ghost kitchens or virtual restaurants. They’re great for startups that don’t want to spend too much money upfront.

    A virtual kitchen can be the best option because it requires less investment. If you want to make a profit without spending a lot of money, starting a cloud kitchen is the right option. However, not all cloud kitchens are successful. Many entrepreneurs fail to implement their ideas properly. In this article, we’ll talk about how to set up a cloud kitchen and how much it will cost.

    What is a Cloud Kitchen?

    A cloud kitchen is like a restaurant, but it only does online food delivery and takeout. The cool thing is that it doesn’t need a storefront with dine-in space, so you can start one even in your little home kitchen! You don’t need to hire people to manage staff or worry about front-of-house labor and overhead. All you need is a menu that’s delicious and healthy, and you can connect with food delivery partners or even build your own food delivery app to start serving people. In short, a cloud kitchen is a commercial kitchen that offers online food delivery and takeout services.

    Benefits of setting up a cloud kitchen

    Cloud kitchen is a new and revolutionary business model that’s becoming really popular. Wanna know why? Well, for starters, it’s a quick and cheaper way to get into the restaurant business. And there are loads of benefits that come with it. 

    • One major advantage is that it’s way more cost-effective since you don’t need to hire hosts, servers, or valets. You only need to worry about paying kitchen staff and delivery agents. That means the operational cost is much lower than a traditional restaurant. 
    • Cloud kitchens are where you can experiment with new brands and menus without any extra investments. You can launch multiple brands without changing locations or investing in a new one. For example, if you’re running a Mexican cloud restaurant, you can easily start another brand for Thai cuisine without extending the existing menu! 
    • You get more flexibility with menus. You can change them up without worrying about reprinting physical menu cards every time. This saves a lot of time and money. 
    • Cloud kitchens allow you to track data and analyze customer behaviour. This helps you save additional expenses by scrapping items with fewer orders and executing new strategies to gain customers. You get to meet your customers’ demands with efficiency and lower wastage.

    Tips to Setup Successful Cloud Kitchen Business

    Establishing a cloud kitchen can be a challenging task, as its success is heavily reliant on a well-structured and robust workflow. If you have the determination to initiate a food delivery business and make it a triumph, it is imperative to familiarize yourself with the key steps involved in setting up a cloud kitchen business. Proper planning and execution of these steps will ensure a smooth and successful journey towards establishing a successful cloud kitchen.

    Online ordering in a cloud kitchen setup

    Online ordering is the primary source for delivery-only restaurants. It can get complicated managing orders from different sources, but a cloud kitchen POS can help by allowing you to accept and manage orders.

    Processing an order in an online food delivery system

    Once you receive the order, you must process it quickly while ensuring that it’s made just the way your customer wants it. To do this, ghost kitchens must have different teams of chefs for different types of food or brands. 

    But how do the chefs know what to make? That’s where the POS (point of sale) system comes into play. The POS kitchen display system shows the chefs the order and any additional instructions. This way, they can easily view the details and prepare the order.

    Kitchen staff for cloud kitchen

    If you want to start a successful cloud kitchen restaurant, the most important thing is to hire the best chefs. Virtual kitchens aim to provide customers with delicious meals and excellent service, so investing in quality chefs is crucial. Since there is no sit-down dining, there is no need to hire waiters, hosts, or other staff.

    In addition to skilled chefs, restaurant owners will also need delivery personnel if they want to offer in-house delivery from their cloud kitchen setup.

    Supply management

    It is crucial to have a reliable system for managing your supplies. The way you manage your supplies for a virtual kitchen is the same as how you would manage them for a physical restaurant. However, it’s essential to have a good system in place to keep your suppliers organized and efficient.

    Inventory management for delivery-only kitchen

    Managing multiple brands under one cloud kitchen business can be a challenging task. However, with proper inventory management, it can become easier. A smart Point of Sale (POS) system can help restaurant owners to manage their inventory better.

    A POS system allows you to view and manage inventory at any time, enabling you to keep track of the daily consumption of stock. Additionally, you can raise purchase orders for each brand based on their requirements. This helps you to stay organized and keep your inventory in check, ultimately contributing to the success of your business.

    Location for Cloud Kitchen

    When starting a cloud kitchen business, the location is really important. However, you can choose a location based on the type of customers you want to serve and what the market is like. You don’t need to have a fancy storefront in a prime location. You can start your business in a smaller space like a room, basement, parking lot or other places that might not be as noticeable.

    Essential Kitchen Appliances for Cloud Kitchen

    If you’re planning to start a cloud kitchen business, you’ll need to have some basic kitchen equipment. This will include things like- 

    • Exhaust hood
    • Oven
    • Fire suppression system
    • Refrigerators and freezers
    • Cooking Range
    • Counters
    • Sinks
    • Commercial fryers 

    These are some of the essential items that you’ll need to have to get started.

    Start a Cloud Kitchen Business, Hassle-free

    Starting a cloud kitchen business can be a great way to make a profit with low investment. However, it is slightly different from traditional restaurants and requires some planning. 

    • The first thing you need to do is set up an online ordering system that your customers can access through the internet or their smartphones. 
    • Before starting the business, it’s important to know your customers’ demographics. Understanding their preferences will help you design your menu and target your marketing efforts. You can use online surveys, social media campaigns, and other tools to gather this information.
    • Apart from cooking, you also need to have some experience in accounting, management, and marketing. This will help you run the business more efficiently and profitably. It’s also important to analyze your competitors to find ways to improve your delivery-only kitchen.
    • While setting up a cloud kitchen costs less than building a traditional dine-in restaurant, you still need to bear some initial costs. You will need to invest in equipment like ovens, microwaves, utensils, burners, and more. It’s also important to equip your kitchen with upgraded technology like mobiles, laptops, tablets, and POS systems to manage everything from receiving orders to delivery.
    • Before you start your cloud kitchen business, you will need to get an FSSAI license. This license regulates everything from food storage to preparation and delivery. You will also need to spend some money on proper packaging, pandemic precautions, and an organized delivery system.

    Starting a cloud kitchen business requires planning, research, and investment. But with the right approach, it can be a profitable and rewarding venture.

    Most Popular Cloud Kitchen Business Models

    Cloud kitchens are becoming popular among food entrepreneurs because they offer an affordable way to start a restaurant business. These kitchens operate on a delivery-only basis, without any dine-in or takeaway options. There are six types of cloud kitchen business models, each with its own unique features. 

    Brand-owned single cuisine

    The first model is where one brand owns a single cuisine kitchen. This means the kitchen only produces food for delivery and does not have a physical restaurant. This model is affordable because there is no need to rent additional space for diners.

    Separate dine-in

    The second model is where a restaurant already has a dine-in option but adds a delivery or takeaway option as a side business. This model is low-cost until the restaurant needs additional staff or processes.

    Shared kitchen with Separate dine-in 

    The third model has a separate dine-in restaurant that operates in a shared kitchen space. This is more expensive than the first two models because the shared kitchen must be rented and equipped, and the dine-in restaurant must be maintained.

    Hub and Spoke

    The fourth model is called “hub and spoke”. Multiple restaurants share a centralized kitchen, which is more expensive because of the cost of labour, pop-up locations, and other expenses.

    Multiple virtual brands

    The fifth model is where one cloud kitchen runs multiple brands under one roof. This model can be low or medium cost depending on equipment, space, and rent.

    Shell-kitchen 

    It is a delivery-only kitchen that specializes in one cuisine and has minimal overhead costs. This model is the most affordable.

    Wrapping up! 

    If you want to start a cloud kitchen business, you gotta work hard from day one. First, figure out the right cloud kitchen model for your business, find a solid mobile app development company to create a professional platform, budget accordingly, and more. To make things easier, you can check out Foodiv – they’ve already designed, developed, and launched a hundred similar platforms.

    Follow and Connect with us: TwitterFacebookLinkedinInstagram

    Updated RERA Uttarakhand Regulations

    RERA is defined as a regulatory authority that maintains a set of rules and regulations with the ultimate goal of pacifying the real estate industry and its workings with transparency, as well as warding off any discrepancies and fraudulent activities that developers may engage in.

    As RERA, the Real Estate Regulation and Development Authority Act, came into existence in May 2017, each state in India launched its own regulatory authority and an online portal, Uttarakhand RERA is one of them. With each state emphasizing its own RERA, it became possible to define and practice compliance and complaint redress. 

    Eligibility for registering with RERA Uttarakhand 

    In order to register your real estate project under RERA UK, you must meet certain requirements, according to the RERA Uttarakhand registration eligibility criteria. 

    Following are the eligibility criteria for Uttarakhand RERA that must be met in order to register with this regulatory authority:

    • Any housing real estate project with an area of 500 square meters or more than 8 apartments has to be registered with the Real Estate Regulatory Authority (RERA) prior to advertising or selling a project.
    • Any real estate agent must register themselves with RERA prior to promoting the sale or purchase of real estate properties. 
    • If any project is ongoing which has not obtained the completion certificate on the date of commencement of the Act is required to be registered with RERA within three months. 

    Transparency in the market 

    RERA protects buyers from non-professionals by ensuring that the land title is clear, the encumbrances are viable, and the documents up for sale are solid, legally enforceable, and in line with the model documents. Independent engineers and financial experts monitor physical progress and financial discipline, as well as ensure the development and operation of the owners’ associations. 

    The act promotes transparency in the real estate sector in the following ways:

    • Ensures that sanctioned plans, layout plans, and specifications are approved by the appropriate authority. 
    • It enables buyers to request from the promoter the proposed Plan, the proposed Layout Plan of the entire project, and the Floor Space Index proposed to be consumed throughout the entire project.
    • The authorized and proposed number of buildings or wings to be built. 
    • The project’s completion timeline, stage by stage, includes provisions for civic infrastructure such as water, sanitation, and electricity. 
    • Quarterly update of the number of covered parking spaces and garages booked. 
    • Update the list of approvals granted and pending approvals on a quarterly basis. 
    • which are subsequent to the commencement certificate.
    • Quarterly project status updates
    • Other information and documents required by GUJRERA regulations.  

    The RERA registration number and website address of GUJRERA, where all the details of the registered project have been entered, must be prominently displayed in the advertisement or prospectus issued by the promoter. 

    Financial discipline 

    • According to the act, the promoter cannot accept more than 10% of the total cost of the apartment, plot, or building as an advance payment or an application fee from a person without first concluding a written agreement for sale with that person and registering the said agreement for sale.  
    • Allottees must maintain a separate account in a designated bank to cover the cost of construction and land costs. This account may only be used for that purpose and must be funded with 70% of the amounts periodically realized for the real estate project. 
    • A practicing chartered accountant, an engineer, and an architect must certify the project’s progress before withdrawals from these accounts may be made.
    • In the event of any misrepresentation or error, the promoter is required to give the buyer a full refund of the purchase price plus interest. 
    • Copy to be sent to RERA Uttarakhand of Project Accounts to be Audited/FY.
    • Provision for RERA Uttarakhand to freeze the project bank account upon non-compliance.
    • Impose stronger financial penalties for violating RERA Uttarakhand. 

    How to register a project with Uttarakhand RERA

    Following are the given steps to register a real estate project with RERA Uttarakhand- 

    Step 1: Firstly, log on to the official website of Uttarakhand RERA.

    Step 2: Navigate to the ‘Project Registration’ option on the homepage, and this will take you to the page where you have to fill out the registration. 

    Step 4: Click on the “Next” button in order to proceed, following the instructions mentioned over there. 

    Step 5: Now you can check the list of all registered projects with RERA Uttarakhand. 

    Real estate agent registration  

    Here are the steps which you need to follow in order to register as a real estate agent with RERA in Uttarakhand online-

    Step 1: Log on to the official Uttarakhand RERA website. 

    Step 2: Select the “Agent Registration” tab on the homepage of the UK RERA website, this will redirect you to the page where you have to fill up the required details in the registration form.

    Step 4: After filling out the registration form click on the “Next” tab in order to move further as per the given instructions.

    RERA Uttarakhand Documents and Information Required

    The required documents for RERA Uttarakhand must be submitted by the real estate promoter and agent, in order to complete the RERA UK registration, are given below –

    Uttarakhand RERA Documents for Promoters

    These are the required documents for UK RERA that a promoter is required to submit – 

    • An authenticated PAN card copy 
    • An audited balance sheet for the previous financial year 
    • IT Returns for the previous 3 financial years
    • Details related to the encumbrances on the land for which the real estate development has been proposed including the information on any title, interest, litigation, dues, etc.
    • Total number of open parking areas that are available in the proposed real estate project
    • A valid copy of the legal title deed that specifies the promoter’s title to the land for which the real estate project development is proposed
    • A declaration stating that the promoter shall not discriminate against any allottee at the time of allotment of a property

    Required Documents for Real Estate Agents

    Here are the RERA Uttarakhand documents that are required to be submitted by real estate agents for the RERA real estate project registration- 

    • A copy of the PAN card 
    • A copy of address proof of the agent’s address or the address of partners or directors
    • The registration certificate copy (in case of companies or firms)
    • A copy of the address proof of business
    • Photographs of the partners, agents, directors, etc.
    • IT Returns for the previous 3 financial years

    How to File a Complaint with RERA Uttarakhand?

    The RERA Act is intended to protect the buyers from the malpractices carried out by the developers as well as to ensure transparency across all real estate dealings. This act came into effect in May 2017 across all the states of India with the intention of making sure that there is speedy dispute resolution within the real estate sector. 

    Each Indian state came up with its own act along with a website and a particular authority that provided buyers with an opportunity to file complaints, and the concept intact. Buyers can file a complaint under the Uttarakhand RERA Act against any malpractice with respect to agent services or the registered project. 

    The following is the procedure for filing a complaint with Uttarakhand RERA:

    Step 1: First of all, head to the official RERA Uttarakhand website. Click on the “Complaint Registration” tab of the website. 

    Step 2: Then, select the option for whether you’d like to complain before RERA or under the authority that is adjudicating. 

    Step 3: In the next step, you have to fill out the form online. You must fill out this form completely, including the complaint against column and a statement indicating whether or not the project in question is registered with RERA Uttarakhand.

    Step 4: Fill in the required details related to the complainant, including their address and contact number. 

    Step 5: Next, the respondent’s information, including their address and the complaint’s details, must be included. This information must also make clear any relief that is anticipated from RERA.

    Step 6: After you have completed filling out the form with all the necessary information, you must continue by submitting the supporting documentation. You have to make an online payment or bank draft worth INR 1000/-. Then, by clicking the submit button, you can proceed with declaring and then confirming your consent.

    You can save your complaint reference number for future use after completing the form and submitting it.

    Follow and Connect with us: TwitterFacebookLinkedinInstagram

    Complete Guide to Andhra Pradesh RERA

    With the aim of bringing transparency, the government of India established the Real Estate Regulatory Authority (RERA) and ordered each state to establish its own set of RERA provisions under the Real Estate (Regulations and Development) Act, 2016.

    Under the Real Estate (Regulation and Development) Act, 2016, Andhra Pradesh RERA was established. The state governor had already published the Real Estate (Regulations and Development) Act 2017. The Act was notified on March 27, 2017, and came into effect on May 1, 2017. Developers, builders, and real estate agents must follow the norms of the RERA Act. 

    Objectives & Features Of Andhra Pradesh RERA

    The emergence of RERA Andhra Pradesh made it easy for buyers to easily access all the details related to real estate projects. Here are some of the features and objectives of the APRERA. 

    • AP RERA approaches to address the buyer’s grievances related to real estate. 
    • This regulatory body has the whole authority of the reals estate sector and regulates every activity from construction, dealings top transactions for both commercial and residential projects. 
    • Under the AP RERA provisions, both buyers and sellers are required to publish every detail of the real estate project on the official website of AP RERA. This information includes the project plan, land title status,  approval certificates, layout plan, plan for development, complete schedule, etc.
    • The developer is required to pay compensation if he fails to complete the construction of the project within the deadline given. 
    • To protect the buyers’ interest the Act aims to bring accountability in the real estate sector. 
    • AP RERA intended to bring transparency to the real estate sector in order to reduce the chances of promoters and agents defrauding buyers. 
    • AP RERA governs real estate to ensure professionalism in the industry. 
    • It establishes the symmetry of information between real estate dealers and buyers.
    • It established a fast mechanism to provide speedy resolution to real estate disputes among buyers and sellers. 
    • The RERA act has forced some responsibilities on both buyers and real estate dealers.
    • With good governance in the real estate sector, it aims to encourage investments and investor confidence. 

    How to register a project with Andhra Pradesh RERA?

    The registration process is simple and can be done online as well as offline. It is crucial to read and understand the guidelines before filling out forms. 

    Here are the steps that you will need to follow during registration with RERA:

    • First, visit the official AP RERA website, then select “Project Registration” under the registration tab on the homepage.
    • Now, click on “New Project” to register a new project or select “Existing Project” to update an old project under AP RERA.  
    • Fill in the required details on the form such as PAN number, Adhaar details, location details, GST number, license number, contact details, and bank account details along with the latest bank account statement.
    • After filling in all the information click on “Save and Continue”. 
    • Finally, make the payment for the registration fee to successfully register the project under AP RERA. 

    Agent registration under Andhra Pradesh RERA 

    • Go to the official website of AP RERA and click on “Agent Registration” under the “Registration” tab. 
    • Select as per the case whether you are a new or existing registered agent.
    • A form will appear, then you have to fill in the required details in the form and upload all the relevant documents. 
    • Now, pay the registration fee to complete your registration process. 

    Applicability Of AP RERA

    • The Act is applicable to all new real estate projects, including areas of more than 500 square meters or residential apartments with more than 8 units, in all phases. It includes plots, apartments, etc. 
    • As of the date of AP RERA’s commencement, i.e.., 01/05/2017, it is applicable to all active projects (aside from those listed below).
    • handling of layout projects, such as open spaces, roads, services, and amenities, by the local authority.
    • laying of slabs in housing developments.
    • Up to 50% of the homes, apartments or other structures have executed sales or deeds before development projects are finished. 
    • Finishing up the necessary preparation work and submitting a request to the appropriate authority for the issuance of a certificate of completion or occupancy

    Required documents for RERA Registration 

    For real estate developers 

    • Documents for information of the promoter include PAN Card, passport size photographs, address proof, etc.
    • Financial statement declaration document (Audited sheet of balance, profit and loss statement, ITR, statement of cash flow, etc.)
    • The project information with all the fitting documents (details of land encumbrance, plans for development, plans for layout, details of the location, deed of title, certificate of structural stability, etc.)
    • Bank account details where the funds for the project are saved. 

    For real estate agents 

    • PAN card 
    • Adhaar card
    • Agent or entities contact details 
    • Enterprise information 
    • Details of litigations 

    How to check the RERA application status 

    • Visit the official website of AP RERA 
    • Navigate to the “Registered” tab under this option select “Project”.
    • You can access all the details of the project and its status. 

    Moreover, you can download the list of projects as a Word or Excel file. 

    Process of filing a complaint under AP RERA 

    • Visit the AP RERA official website at rera.ap.gov.in, click on “Registration” and select “Complaint registration” from the drop-down options. 
    • A form called C1 will appear which needs to be filled and submitted with all the relevant documents for the complaint registration. 
    • Select “save and continue” on each page and submit the complaint form at last. 

    Grading Of Agents Under AP RERA

    To make the real estate sector efficient and transparent, along with narrowing the trust deficit in the market, AP RERA is soon to adopt a system that will be used to grade the real estate agents in the state. The buyers will understand the value of working with a good agent with the aid of agent grading. 

    Earlier, buyers relied on personal recommendations to find a good agent. But now that the AP RERA has made information available to them, they can access the sincerity and effectiveness of agents. Grading of agents will begin soon, using the information and documents submitted by brokers during RERA AP registration, and will increase accountability in the real estate market.

    A number of factors, including information about real estate partners, legal matters, clearances, prior projects for which the agent facilitated sales, the broker’s financial stability, a balance sheet, and IT returns, will be examined in order to grade the broker. The real estate agent’s agency will also be monitored by RERA throughout the tenure in addition to all of the above.

    Follow and Connect with us: TwitterFacebookLinkedinInstagram

    Latest Updates on Bihar RERA- Registration Process and Rules

    The establishment of the Real Estate Regulatory Authority has somewhat changed the landscape of real estate in Bihar (RERA). Home purchasers, investors, and promoters now have better responsibility, transparency, and security due to the introduction of RERA Bihar.

    What is Bihar RERA?

    Bihar’s RERA Act came into effect on April 28, 2017, and it applies throughout the state. It is implemented to prevent fraudulent and deceptive actions, which greatly aid in establishing transparency and accountability in Bihar’s real estate market.

    Functions associated with RERA Bihar 

    Registration of real estate projects 

    Real estate agents Registration 

    Redressal of complaints 

    Disclosure of the promoter’s project 

    Benefits of RERA

    The RERA act intends to bring transparency and efficiency to the real estate sector, these are the major concerns when it comes to investing in real estate. The RERA Act has made it compulsory for every state government to establish its own set of real estate regulatory body to make the home-buying process transparent, hassle-free, and professional. The formation of a specific state RERA has eliminated concerns about transparency and security. 

    Provision under RERA Bihar 

    The provisions under the RERA Bihar are divided into 10 chapters, and each chapter caters to a different category. The following are some of the major rules listed in RERA Bihar. 

    • The Act necessitates the developers and agents to get their projects registered along with relevant documents with the RERA. 
    • Registration and further approval of projects in case they fulfil RERA requirements
    • Evaluating applications and approvals of the registered agent or promoter
    • Filing complaints of a homebuyer against developers and providing speedy resolution to their concerns 
    • Verifying information on projects that are expected to be delisted 

    Fees and charges 

    All developers, agents, and their real estate projects are required to get registered with RERA, except in the case of the below-mentioned scenarios. 

    • If the proposed land area is less than 500 sq meters does not require registration 
    • Any residential apartment has less than 8 units including all phases of construction 
    • Any project where the developer has received the completion certificate before the emergence of the RERA Act

    You need to submit a RERA online fee in order to get registered with RERA. The registration fee is different for each type of project. 

    Fees And Charges of Bihar RERA

    Late Fees Charges

    Imposed late fees in case of residential project registration (1000 square meters) is Rs 5 Lakh

    Imposed late fees in case of commercial, mixed, and residential project registration is RS 7 Lakh

    Other Charges Implied

    To avail copy of first five pages of a document

    Rs 100

    To avail copy of remaining pages (After five pages) of document

    Rs 20 is charged per page

    To file a written statement

    Rs 200

    Case File Inspection

    Rs 200

    POA in the course of hearing

    Rs 50

    Case restoration

    Rs 500

    On-site inspection of the real estate project by the RERA authority 

    Rs 10,000 for above 60Kms, Rs 6,000 (30Kms to 60Kms), Rs 3,000 (within 30 km)

    Alterations and modifications are done in the registration form

    Rs 1,000

    To submit query response

    Rs 1,000

    To submit project status on a quarterly basis

    Rs 1,000

    To submit an audited statement of the dedicated project account

    Rs 1,000

    Group Housing 

    • The fee charged will be Rs 5 per sqm if the area is less than or equivalent to 1000 sqm,
    • If the area exceeds 1000 sqm, the fee will be Rs 10 per sqm

    Mixed Developments Project

    • If the area is less than or equivalent to 1000 sqm in that case the fee is Rs 10 per sqm
    • If the area exceeds 1000 sqm the fee becomes Rs 15 per sqm

    Commercial Projects

    • If the area is less than or equivalent to 1000 per sqm, the fee charged is Rs 20 per sqm
    • If the area exceeds in that case the fee is Rs 25 per sqm

    Plotted Development Projects 

    • Rs 5 per sqm capped at Rs 2 Lakh

    Required documents for agent registration 

    • Authentic proof of Place of Business
    • Pan Card of Real estate agent 
    • Proof of Registration – COI or Partnership Deed 
    • Photograph of Real Estate Agent
    • Business Pan Card of Agent
    • Aadhar Card of Real estate agent 
    • Other documents such as by-laws, memorandum of association and articles of association

    How to register as a promoter 

    • Visit Bihar RERA official website at rera.bihar.gov
    • Click on “project registration”, and it will redirect you to new page 
    • Now, select the type – Promoter/Real estate agent
    • Select “promoter”
    • Fill in all the required details such as mobile number, email Id, and PAN number
    • After completing all the steps, click on the “register” tab to complete the RERA registration process

    How to register as an agent

    • Visit Bihar RERA official website at rera.bihar.gov
    • Click on “project registration”, and it will redirect you to new page 
    • Now, select the type – Promoter/Real estate agent
    • Select “Real estate agent”
    • Fill in all the required details such as mobile number, email Id, and PAN number
    • After completing all the steps, click on the “register” tab to complete the RERA registration process

    Filing complaint with RERA Bihar

    • You need to fill and submit Form M to file a complaint to the authority
    • You need to fill and submit Form N to file a complaint to the Adjudicating Officer

    How to file a complaint 

    • Click on the “Complaint Registration” on the homepage of the official website of RERA Bihar at rera.bihar.gov
    • Select where you want to file you complaint form the option “Compliant to RERA / Complaint to Adjudicating Authority”
    • Now, fill all the required details in the RERA online form, the RERA details whether the project is registered or not needs to be mentioned in the form
    • After filing the form, attach the required documents with a bank draft of Rs 1000 and click on “submit” to register your complaint. 

    RERA Conciliation Forum 

    To resolve disputes between home buyers, real estate agents, and developers, the conciliation forum is created. RERA protects home buyers from malpractices by developers or agents, thus conciliation forum is formed to address the disputes between homebuyers and developers.

    Conciliation Process 

    The conciliation process starts once the complaint is registered online, and below are the steps that are followed thereafter: 

    • In the next step the complaint is sent to the promoter for their consent and the builder must approve the request on the RERA official website
    • Complaint registration requires to submit fee 
    • Once the payment is done, the complaint is sent to the conciliator, which is followed by a hearing to resolve the issue amicably 
    • The coordinator facilitates and attempts to resolve the matter. Further, consent is signed by both parties
    • If there is no consensus, the complaint is dismissed, and both parties are free to file an appeal in court

    Compliances under RERA Bihar 

    To ensure transparency and professionalism, RERA Bihar introduced “Quarterly Compliance”.  

    • Developers must provide a quarterly update about the proportionate completion of their projects every quarter 
    • Architect certificate (Form 1) Engineer Certificate (Form 2) Chartered Accountant Certificate (Form 3) are categorized as RERA Return 
    • The developer must provide the construction status to the home buyers for their respective projects 

    Checklist for the RERA Bihar “Quarterly compliance” includes the following

    • Percentage of water supply
    • Percentage of flooring, internal plaster, and internal walls
    • Installation of electrical fittings, lift, common areas, and water pumps
    • Percentage of lobbies, staircase, underground water tanks 
    • Information about approvals, amendments, and modification

    Follow and Connect with us: TwitterFacebookLinkedinInstagram

    Latest News